|
As Windows as
evolved over the years, Microsoft has
added new features/utilities to help manage the software and hardware on a
computer. One are where it is
still lacking is with partition management. Windows
XP (and other NT-based
systems) has a built-in Disk Management console where you can delete and create
partitions, along with some more advanced features if the disks have been "upgraded"
to be dynamic disks. But if you want to move, resize, or copy partitions, you
need a third-party utility. And you certainly need a third-party utility to
read partitions from other operating systems.
Paragon Software Group over
the years has filled this void nicely (see previous
review) with there Partition
Manager product. I recently had an chance to look
at the latest release, Partition
Manager 7 Personal Edition.
Installation
I was given a registration code and links to download 2 files. The setup for
the main program was 14 MB and the setup for the recovery CD was about 20 MB.
Both of these files downloaded within a few minutes on my cable connection.
Installing the main program was very easy. There weren't many options, and
keeping all the defaults installed the program in barely a minute. It then
prompted me to reboot.
The recovery CD doesn't really install anything. There is an executable file
that is 20 MB in size that you run. You are given the option to burn directly
to a CD or DVD, or you can create an ISO image of the recovery CD. In both
cases, the contents of the CD or ISO was about 30 MB. When I burned to a CD-RW,
it prompted
me to erase it, and then burned the CD. Since it is only 30 MB in size, the whole
process only took a minute or two.
Testing
Note: I have tried to be specific about whether I was performing a certain
action on a hard drive or a partition on that hard drive. Most actions can
be done on an entire disk (especially if it is one partition), but some things
you can't do. Of course you can't actually resize a hard disk drive beyond
what it's native capacity is.
The first thing I tested was the recovery CD. I am fond of the idea of not
installing software. If I can boot from a CD or just run an executable without
having to install something and mess with the registry and DLLs, I'm good with
that.
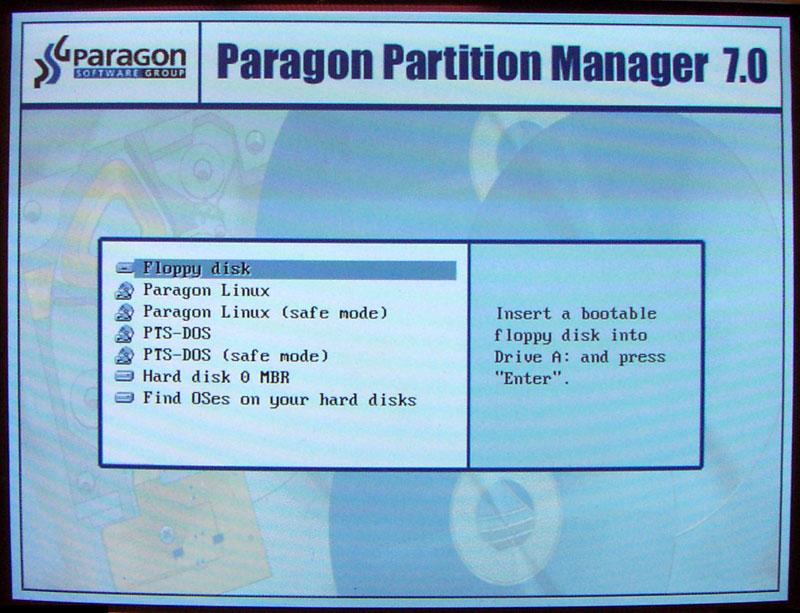
When the computer boots up to the main CD screen, you end up at a boot manager.
You can still boot from the computer, from a floppy disk, and from a couple
of different recovery consoles.
 |
 |
 |
Paragon Linux
Boot Manager |
Paragon Linux
Main Screen |
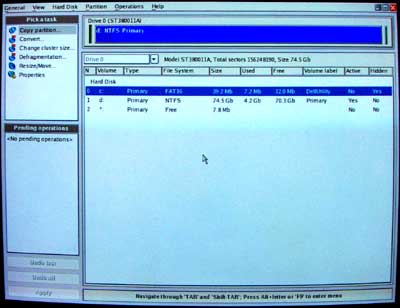
Paragon Linux
Partitioning
Operations |
Click on any of the above images to see a larger version |
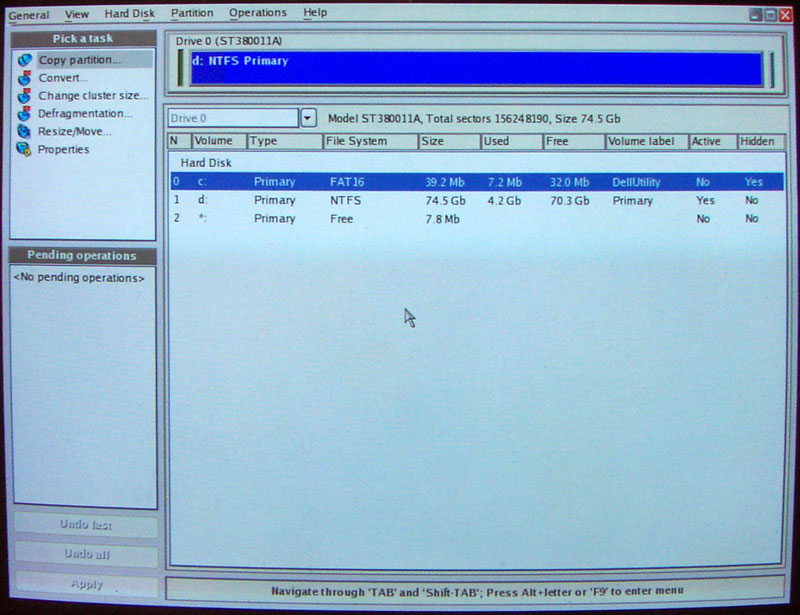
I didn't play too much with the various menu options. I went right into Paragon
Linux, and then right into Partitioning Operations. The software looks
almost identical to the Windows program. I was very impressed! I could move,
resize, create, copy, etc any of the existing partitions and hard drives I
had
on the disk. I used this to duplicate one 40 GB hard drive to another hard
drive of the same size, as well as one 10 GB hard drive to a 40 GB hard drive.
Both
of these went flawless. The 40GB to 40GB copy consisted of a hard drive that
had 2 partitions, 1 primary (C:) and 1 extended with 1 logical (D:). The whole
process took about 30 minutes. I removed the old drive and was able to boot
from the new drive without any issues.
I was fascinated by the recovery CD. It appeared to do everything that you
can do in the Windows software. I did not test every feature, but I can definitely
say that it did everything I needed it to do. My USB keyboard and USB mouse
both worked fine from the recovery CD. And of course, nothing had to be installed.
You just boot from the CD and go.
The Windows version of the software loads quickly and is easy to run. The
first thing I tried to do was copy a 40 GB hard drive (only 4 GB in use) to
a 20 GB
hard drive. This was my primary hard drive (drive C:) and it told me it couldn't
perform the operation and asked me to reboot. I did, and it came up in another
mode before windows and performed the operation. It took about 14 minutes to
do this. This seemed kind of long. I then copied a 10 GB hard drive (only 5.2
GB in use) and to a 40 GB hard drive. I wanted the entire 40
GB hard drive to be a single partition. This operation was able to be done
in Windows and it only took 5 minutes. After both of these operations were
complete,
when Windows rebooted the next time the hard drive was checked. I found that
the time taken to perform operations was varied. I suppose it depends on the
size of the partition, the amount of storage in use, the fragmentation level
of the drive, the speed of the drive, etc.
  When
you are performing an operation, you can choose to do it immediately, or create
a job or action list that will grow as you plan more operations. You can then
choose to start the list, and all the operations are done at once in order.
In one of my tests, I took a 10 GB hard drive that had a 10 GB partition
(5.2
GB used),
and chose
to resize
it
to 6
GB.
This
didn't happen right away, but was added to the list of actions. I also chose
to create an extended partition with the remaining 4 GB. Then in that extended
partition, I chose to create a logical drive. Lastly, I chose to format the
logical drive. As you can see by the screenshot on the left, it is showing
that there are 4 actions that need to be performed. You see what the drive
looked
like before (a solid blue line indicating it was a 10 GB NTFS partition). You
then see what it will look like once the actions are completed. You can choose
to undo all the actions (not do anything), or roll them back one at a time.
Remember, at this point, nothing has been done yet. You are just telling the
software to either do what you had planned or to go ahead and do what
you had asked it to do. When
you are performing an operation, you can choose to do it immediately, or create
a job or action list that will grow as you plan more operations. You can then
choose to start the list, and all the operations are done at once in order.
In one of my tests, I took a 10 GB hard drive that had a 10 GB partition
(5.2
GB used),
and chose
to resize
it
to 6
GB.
This
didn't happen right away, but was added to the list of actions. I also chose
to create an extended partition with the remaining 4 GB. Then in that extended
partition, I chose to create a logical drive. Lastly, I chose to format the
logical drive. As you can see by the screenshot on the left, it is showing
that there are 4 actions that need to be performed. You see what the drive
looked
like before (a solid blue line indicating it was a 10 GB NTFS partition). You
then see what it will look like once the actions are completed. You can choose
to undo all the actions (not do anything), or roll them back one at a time.
Remember, at this point, nothing has been done yet. You are just telling the
software to either do what you had planned or to go ahead and do what
you had asked it to do.
I chose Apply, and about 3 minutes later it was done. Without rebooting, I
went into Windows Explorer, to look for my new drive. The resized drive D: was
there (showing the correct size), but the new drive E: wasn't there. I rebooted
the computer, but there was still no drive E:. I had to go into Computer Manager\Disk
Management and assign the logical drive a drive letter. Once I did this it was
accessible and working fine.
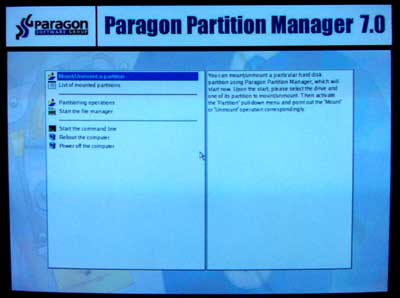
I next deleted the 6 GB drive D: that I had. I rebooted the system, and then
went into Partition Manager again. I chose to Undelete a partition. A window
popped up (see screenshot at right) and it scanned the hard drives for deleted
partitions. The scan took about 2 minutes and then showed me that there was
a recoverable partition. I chose to undelete it, and about 5 seconds later
it was back. However, it wasn't visible in Windows Explorer (similar to my
experience
above). I again went into Computer Manager\Disk Management and assigned a drive
letter to the undeleted partition and it worked fine. All the data from the
deleted partition was there and I was able to successfully access it. This
kind of operation won't always be successful. Depending on how long ago a
partition was deleted and what other operations were done on the drive, the
data or partition may not be recoverable.
The software does have some wizards that walk you through some common procedures,
but I found that the software is so easy to use, you won't need the wizards.
Conclusions
Partition Manager 7 is a great
program. I've used several other competing products, and Partition
Manager 7 is just as easy to use, if not more so than the competitors. I
was especially fascinated by the recovery CD and the ability to perform the
partition operations without having to be in Windows. Although a version of
Linux is used to power the CD, the appearance and functionality were virtually
identical to the Windows version. This is very nice, and I highly recommend
it to everyone.
There are several versions of Partition
Manager; Personal, Professional, and
Server. You can view a comparison
chart on the Paragon web site to see which version best suits your needs.
You can download a demo
of Partition Manager 7. It
shows you what the software can do, but will not actually perform any partition
operations
You can purchase any version of Partition Manager 7 directly
from Paragon. The Personal version is listed at $49.95 US; the Professional
version is listed at $99.95 US; the Server version is listed at $299.00
US.
The software comes with an unconditional 30 days money back guarantee. Registering
your product gives you access to E-Service web site. From this site you can
download updates or upgrades to any of their software that you
have registered. The comparison
chart explains what updates or upgrades the different versions are eligible
for.
Return to FreeHelp Software Reviews Home Page
Return to the FreeHelp Headquarters
Return to PCIN.net Home Page
|